
I was recently working on an Angular application that had a specific requirement. The application shell loads feature modules under specific routes. Each module should have the ability to expose an item in the application shell toolbar. With one colleague we discussed how we could achieve that.
If you can't wait to see it in action, here is the link to the repo: https://github.com/kevinmerckx/ng-feature-extension
First naive attempt
We considered using the Angular CDK and its portal API. The limitation appeared pretty quickly: the menu item declaration, from within the template of the root component of the feature module will only be evaluated when the feature is loaded by the router. Therefore, this approach is not suitable.
We need an "offline" way to declare this toolbar item, without the entire feature module to be loaded.
Solution
The solution I suggest is based on three pillars:
- injection tokens
- extension modules
- component outlets
Let's describe each pillar first.
Injection tokens
Injection tokens are an important part of Angular. They give developers the opportunity to augment the application. For instance, to declare a directive as validator you use NG_VALIDATORS. When you want to declare a custom control value accessor (cf. https://dev.to/kevinmerckx_47/create-a-custom-angular-form-control-3one), you use NG_VALUE_ACCESSOR. When you use them, Angular gives you the ability to extend its API.
Extension modules
When you create a feature module, you usually do so by exporting one Angular module. You then load it in the main module, lazily or not. Keep in mind that you are allowed to split your feature module into several smaller modules. You can provide the shell of your feature through one module and export another one that provides a smaller set of features. Let's call the later kind Extension Modules.
Component Outlets
This API is provided by Angular and gives developers the ability to inject components in a template.
<ng-container *ngComponentOutlet="theComponentToLoad"></ng-container
With those 3 pillars, we can create a mechanism that enables a feature module to use offline an extension API provided by the shell application.
First, you should declare an interface that extensions of feature modules must implement.
For instance, if you want a module to be able to add an item in your application toolbar, your interface could look like that:
import { Type } from '@angular/core';
import { Observable } from 'rxjs';

export interface Extension {
  toolbarItem: Type<any>;
  route: Observable<string>; // here we also provide the route to load when the item is clicked
}
Then, you must declare the injection token that each feature module can provide. Let's call it FEATURE_EXTENSION.
import { InjectionToken } from '@angular/core';

export const FEATURE_EXTENSION = new InjectionToken('FEATURE_EXTENSION');
It is now possible for our toolbar component to use this token at runtime:
import { Component, Inject } from '@angular/core';
import { Extension, FEATURE_EXTENSION } from '../shared';

@Component({
  selector: 'toolbar',
  templateUrl: './toolbar.component.html',
  styleUrls: ['./toolbar.component.css'],
})
export class ToolbarComponent {
  constructor(@Inject(FEATURE_EXTENSION) public extensions: Extension[]) {}
}
It is now time to use the ngComponentOutlet directive from the toolbar template:
<div
  *ngFor="let extension of extensions"
  tabIndex="0"
  [routerLink]="extension.route | async"
  [routerLinkActive]="'active'"
  [routerLinkActiveOptions]="{ exact: true }"
>
  <ng-container *ngComponentOutlet="extension.toolbarItem"></ng-container>
</div>
Our application shell and toolbar are now ready to receive feature module extensions!
Let's move on to a feature module that we call the "Planning" module. This module consists of two things:
- a classic feature shell module that loads components depending on the route:
PlanningShellModule - a lightweight extension module:
PlanningExtensionModule
The PlanningShellModule has nothing particular and is loaded by the router (optionnaly lazily). The PlanningExtensionModule is declared as follows:
import { CommonModule } from '@angular/common';
import { NgModule } from '@angular/core';
import { of } from 'rxjs';
import { Extension, FEATURE_EXTENSION, ToolbarItemModule } from 'path/to/some/shared/folder';
import { PlanningToolbarItemComponent } from './planning-toolbar-item.component';

@NgModule({
  imports: [CommonModule, ToolbarItemModule],
  providers: [
    {
      provide: FEATURE_EXTENSION,
      useValue: {
        toolbarItem: PlanningToolbarItemComponent,
        route: of('planning'),
      } as Extension,
      multi: true
    },
  ],
})
export class PlanningExtensionModule {}
The most important piece is in within the providers property where we provide a FEATURE_EXTENSION value with our toolbar item component PlanningToolbarItemComponent to load and the route to navigate to when clicked. Note the use of multi: true that makes sure we can declare several times this provider from other feature modules!
The PlanningToolbarItemComponent can make use of all the components, directives and pipes that are declared in the ToolbarItemModule.
You can now display custom content in the toolbar of the application shell from a feature extension module.
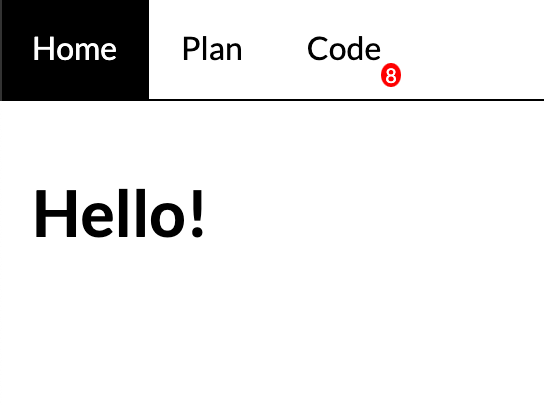
Feel free to check this repository https://github.com/kevinmerckx/ng-feature-extension for the full code of this fully functioning proof of concept. Here is a screenshot:
To summarize, by combining InjectionToken with multi: true, ngComponentOutlet and by splitting feature modules into a shell and an extension modules, we managed to provide a nice way for feature modules to customize the application shell through a nice API defined by an Extension interface.
KM
Special thanks to https://twitter.com/ngfelixl for helping me structure this work.
Photo by Lance Anderson on Unsplash